You don’t need a farmhouse kitchen or a family recipe passed down from 1893 to make killer Amish whoopie pies recipe.
What you do need is the right ratio of cocoa, a not-too-sweet filling, and a solid plan so your pies come out soft, puffy, and ready to go toe-to-toe with anything from a roadside Amish bakery.
Forget the Pinterest fluff. This is the version that actually works – no weird ingredient swaps unless you want them, no cake mix hacks, and zero chance of winding up with flat, dry cookie pucks.
Let’s get into it.
What Are Amish Whoopie Pies (And Why Do Mine Always Come Out Wrong?)
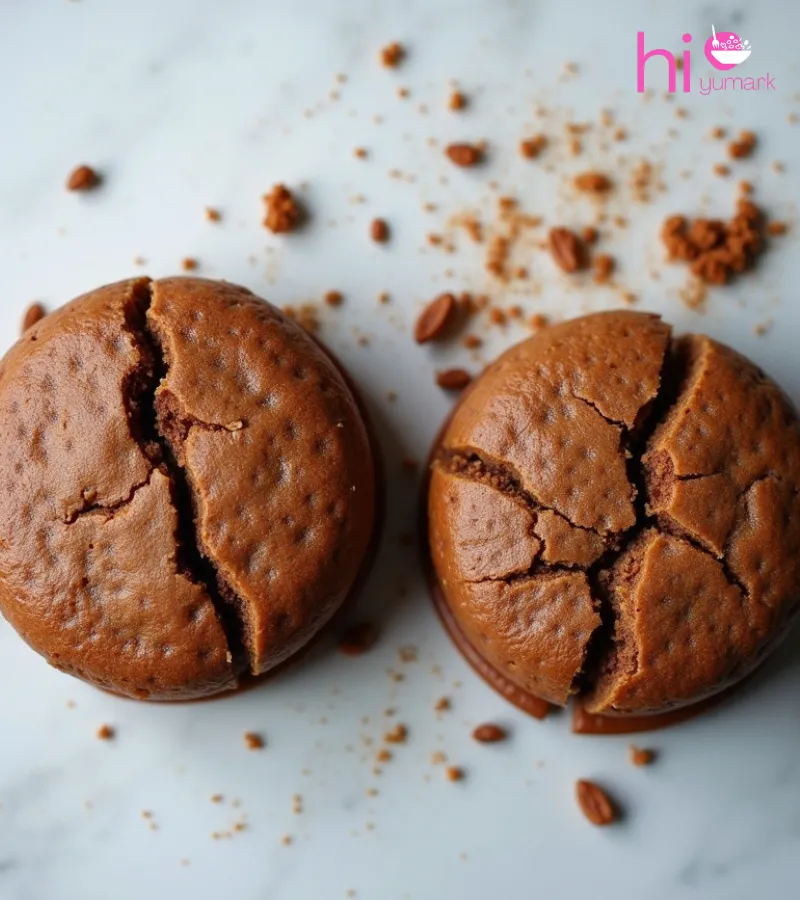
Whoopie pies are basically dessert sandwiches: soft chocolate cake rounds with a creamy filling in the middle. But the Amish version is the OG.
Dense but fluffy. Sweet but not cloying. And yes, marshmallow fluff is absolutely allowed in the filling. Anyone who says otherwise is lying to sound old-fashioned.
If yours are dry, flat, too sweet, or sliding apart like a Jenga tower, you’re not alone. Most recipes online skip the real stuff that makes or breaks these pies. This one won’t.
Want more vintage-style treats? Check out our Amish desserts article – packed with simple, nostalgic bakes that never let you down.
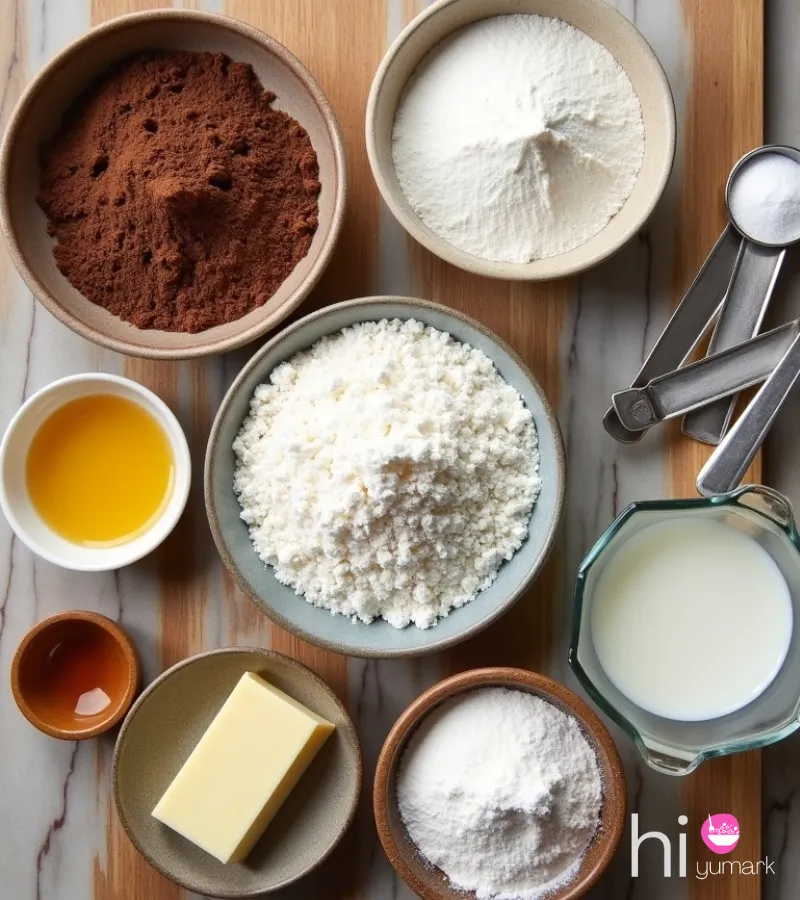
What You’ll Need (No Surprises, Just Straightforward Stuff)
For the Cake Rounds:
- 2 cups all-purpose flour
- ½ cup unsweetened cocoa powder
- 1 ½ tsp baking soda
- ½ tsp salt
- 1 cup buttermilk (room temp = better texture)
- 1 tsp vanilla extract
- 1 cup granulated sugar
- ½ cup vegetable oil (or melted butter – see chart below)
- 1 egg (also room temp)
For the Filling:
- 1 cup marshmallow fluff
- ½ cup unsalted butter (softened, not melted)
- 1 cup powdered sugar
- 1 tsp vanilla extract
Shortcut: If you’re out of time or patience, blend equal parts marshmallow fluff and Cool Whip. It’s not traditional, but it’ll do in a pinch.
Let’s Bake (Step-by-Step, Zero Drama)
Step 1: Preheat Like You Mean It
Set your oven to 350°F (175°C). Not 375. Not 325. 350 is the sweet spot for a high rise without dried-out edges.
Pro Tip: Use an oven thermometer. Your oven lies.
Step 2: Mix Your Dry Stuff
In a large bowl, whisk together:
- Flour
- Cocoa powder
- Baking soda
- Salt
You’re looking for a uniform, light brown mix with no clumps. Set it aside like a good little prep bowl.
Step 3: Wet Ingredients Get the VIP Treatment
In another bowl (or stand mixer if you’re feeling fancy), beat:
- Sugar
- Oil
- Egg
Until it’s smooth and glossy. Then add the buttermilk and vanilla. Beat again until fully combined.
Now slowly fold in your dry mix, a little at a time. Don’t just dump it all in at once or you’ll end up overmixing. You want it just combined – still fluffy, not soupy.
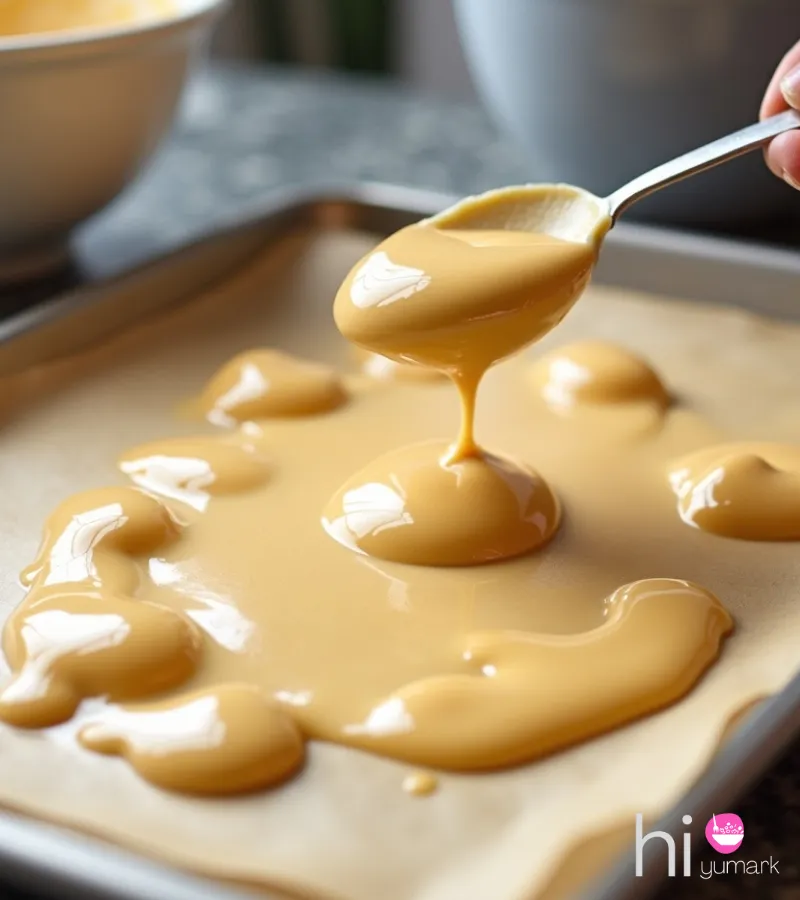
Step 4: Scoop + Bake
Line a baking sheet with parchment paper. Scoop the batter using a medium cookie scoop or a heaping tablespoon.
Spacing: Leave 2 inches between blobs – they will spread.
Bake for 10–12 minutes. You’ll know they’re done when the tops bounce back slightly when you tap them.
Don’t overbake. Dry whoopie pies are a crime against baking.
Let them cool completely on a wire rack before moving on. If you rush the next step, the filling will melt and slide like frosting in a car on a July road trip.
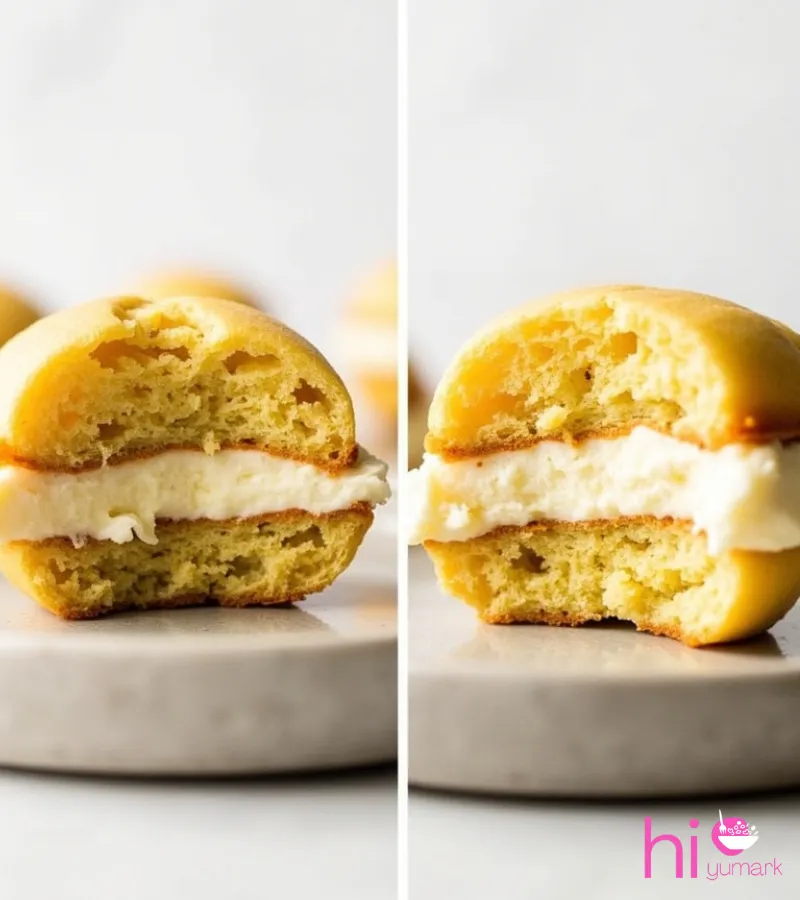
Step 5: Filling Time
In a clean bowl, beat together:
- Butter
- Marshmallow fluff
- Powdered sugar
- Vanilla
Mix until smooth, thick, and creamy. If it looks runny, chill it for 10 minutes. If it’s too thick to spread, let it sit on the counter a few minutes.
Spoon or pipe onto the flat side of one cooled cake round, then sandwich with another.
Boom. Whoopie pie.
Oil vs Butter in the Batter: What’s Better?
| Oil | Butter | |
| Texture | Moist, tender | Slightly denser |
| Flavor | Neutral | Rich, classic |
| Shelf life | Longer | Shorter |
| Best For | Soft, fluffy pies | Extra flavor |
My go-to? Oil for a softer texture that stays moist even on day two. But if you want buttery flavor and don’t mind a firmer bite, go with melted butter.
Common Mistakes (And How to Dodge Them)
You’re not cursed; you just need the right fixes.
| What Went Wrong | What Caused It | How to Fix It |
| Dry cakes | Overbaking or too much flour | Use a kitchen scale or scoop + level. Bake for 10, not 14. |
| Flat as pancakes | Batter too thin or overmixed | Chill it 10 mins. Mix until just combined. |
| Filling melts out | Cakes too warm or filling too soft | Cool cakes completely. Chill filling if needed. |
| Sticky tops | Underbaked or humid kitchen | Bake 1–2 mins longer. Store with wax paper between layers. |
Swaps + Variations That Actually Work
Want to tweak the flavor? Here’s how to do it without wrecking the recipe.
| Flavor | What to Change |
| Pumpkin Spice | Sub ½ cup buttermilk with pumpkin purée. Add 1 tsp cinnamon + ¼ tsp nutmeg. |
| Red Velvet | Add 1 tsp white vinegar + red gel food coloring. Use Dutch cocoa. |
| Peanut Butter | Add 2 tbsp peanut butter to the filling (go creamy, not chunky). |
| Chocolate Chip | Fold mini chips into the batter or the filling. Use mini ones—they melt better. |
Quick Substitutions (No Grocery Run Required)
| Out of This? | Try This Instead |
| Buttermilk | 1 cup milk + 1 tbsp vinegar or lemon juice (let sit 5 mins) |
| Egg | ¼ cup unsweetened applesauce or 1 tbsp flax + 3 tbsp water |
| Marshmallow Fluff | ¾ cup mini marshmallows melted with 1 tsp corn syrup |
| Piping Bag | Zip-top bag with the corner snipped off |
Timing Breakdown (Yes, It’s Worth Planning)
| Task | Time |
| Prep Batter | 15 mins |
| Bake | 10–12 mins |
| Cooling | 20–30 mins |
| Filling + Assembling | 10 mins |
| Total Time | ~1 hour |
You can make the cakes ahead and store them for up to 2 days before filling. Just wrap them tight.
FAQs
Can I freeze these?
Yes. Freeze unfilled cakes or whole sandwiches. Wrap in plastic and stash in a freezer bag. Thaw at room temp.
Do I need a mixer?
Hand or stand mixer is ideal for the filling, but a good spatula and elbow grease work too.
Why does my filling taste too sweet?
Dial back the powdered sugar by ¼ cup, or add a pinch of salt to balance it.
Do I need to refrigerate them?
If your kitchen is cool, they’re fine on the counter for 2 days. Fridge buys you a few more days but makes the cakes firmer.
Save, Screenshot, Repeat
These whoopie pies don’t just work – they hold up, freeze well, and actually taste like the ones you remember from roadside Amish markets. No gimmicks. Just solid ingredients, smart steps, and a filling that stays put.
Screenshot it. Save it. Or send it to your friend who keeps trying to make whoopie pies and ends up with chocolate frisbees. This is the one they’ll thank you for.
Final Words:
You’ve got everything you need to crush this – from the right cocoa ratio to why your filling slid last time. No guesswork, no sad cookies pretending to be cakes. Just real-deal Amish whoopie pies that work.
Use oil for softness, chill your batter if it spreads, and don’t rush the cool-down. That’s how you go from “meh” to “make these again now.”
Ready to brag a little? Good. You earned it. Now go bake like you mean it.
Amish Whoopie Pies Recipe – Moist, Fluffy, Oven-Perfect
Course: DessertCuisine: American / Pennsylvania DutchDifficulty: Easy10
servings15
minutes12
minutes320
kcal27
minutesSoft chocolate cake rounds with a cloud-light marshmallow filling - no craziness, just foolproof old-school whoopie pies that stay moist every time.
Ingredients
2 cups all-purpose flour
½ cup unsweetened cocoa powder
1½ tsp baking soda
½ tsp salt
1 cup buttermilk (room temp)
1 tsp vanilla extract
1 cup granulated sugar
½ cup vegetable oil (or melted butter)
1 egg (room temp)
- For the Filling:
1 cup marshmallow fluff
½ cup unsalted butter (softened)
1 cup powdered sugar
1 tsp vanilla extract
Directions
- Preheat oven to 350°F (175°C)—use a thermometer if you can.
- Whisk flour, cocoa, baking soda, and salt together; set aside.
- Beat sugar, oil, and egg until glossy. Add buttermilk and vanilla.
- Gently fold in the dry mix until just combined—keep it fluffy, not soupy.
- Scoop batter onto parchment-lined sheet, spacing 2 inches apart.
- Bake for 10–12 minutes till tops spring back. Cool completely.
- Beat butter, fluff, sugar, and vanilla until thick; chill if too soft.
- Pipe/spread filling onto one cookie and sandwich with another.
Recipe Video
Don’t Skip These:
- Chill cake rounds before filling to prevent melting. Use oil for extra softness, butter for rich flavor. Warm the filling slightly if too firm.